| I forgot to post this back when I saw it... but while on vacation, and friend of mine and I went to a Cabela's just to kill some time. While there, we found ourselves in the hunting section (which is most of the store... I agree...), and lookey what I found! AN ACTUAL DEER STAND!!! Or more correctly... a "Game Hanger Tripod". Couldn't resist taking a picture and posting it. They still make them in the tripod fashion... although it appears that the pickup truck mounted deer stand is more popular these days. I could see why... easier to transport... still get the same height. But yeah! Deer stand! I like this picture a lot because you can see all of the features that we were hoping to use for the turbine... the crank shaft control that we found on one of the stand legs.... the plate, the legs... everything! I can now officially say that we refurbished an old deer stand because now I know that they did exist and that was the tools function! =D | 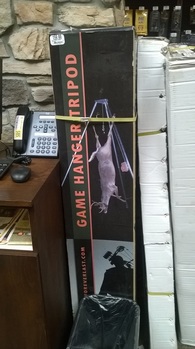 |
|
1 Comment
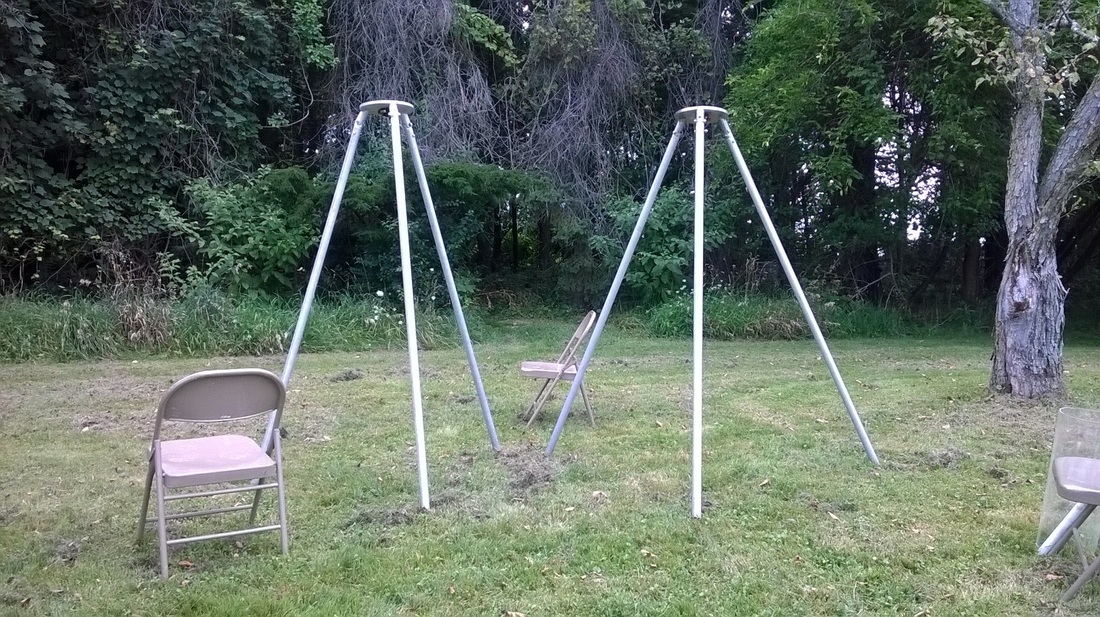
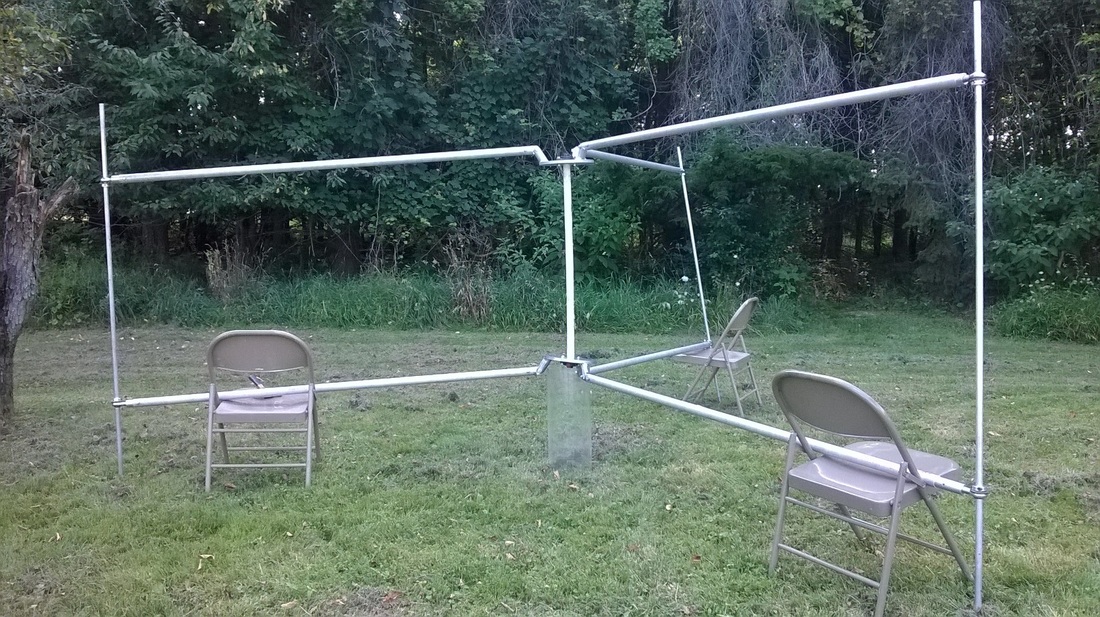
Well, tomorrow is the big day... our final SURES presentation. We just sent the poster off to Staples to get printed... and the presentation should be all set to go for tomorrow. Which makes today our last chance to get any thing that may resemble a turbine up. Unfortunately, we still haven't been able to put the main support shaft into the wooden base, so there is no question about the possibility of getting the turbine running... there is no place to mount it... nonetheless, we were able to get a rough skeleton which was SUPER EXCITING!!! It's a bit wobbly, and the connecting points are still not lined up... BUT it's a skeleton! Check it out!!!!
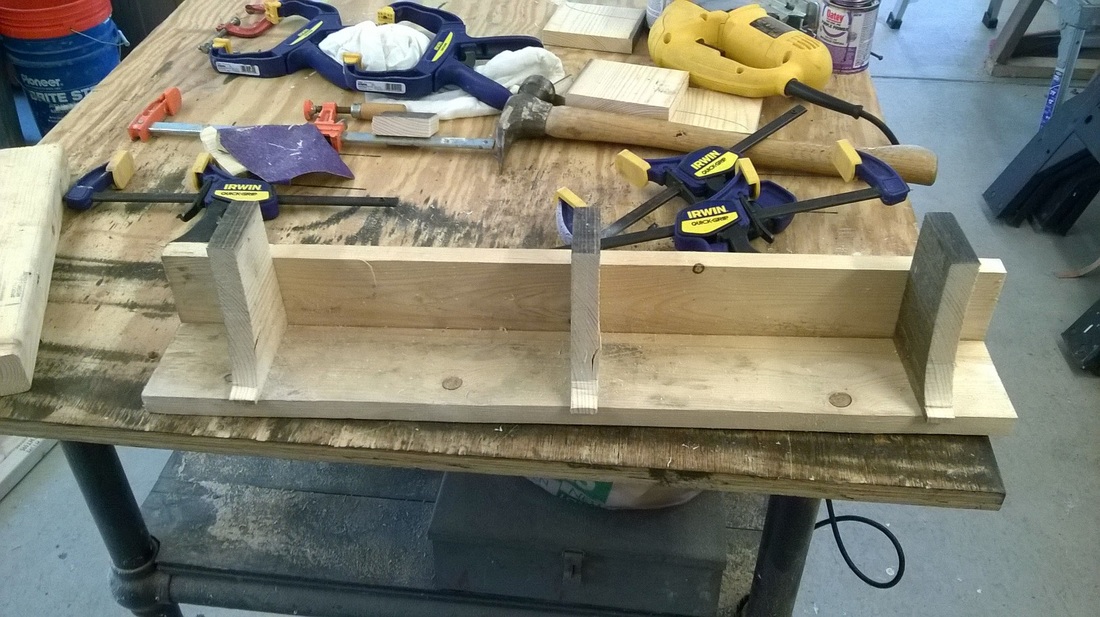
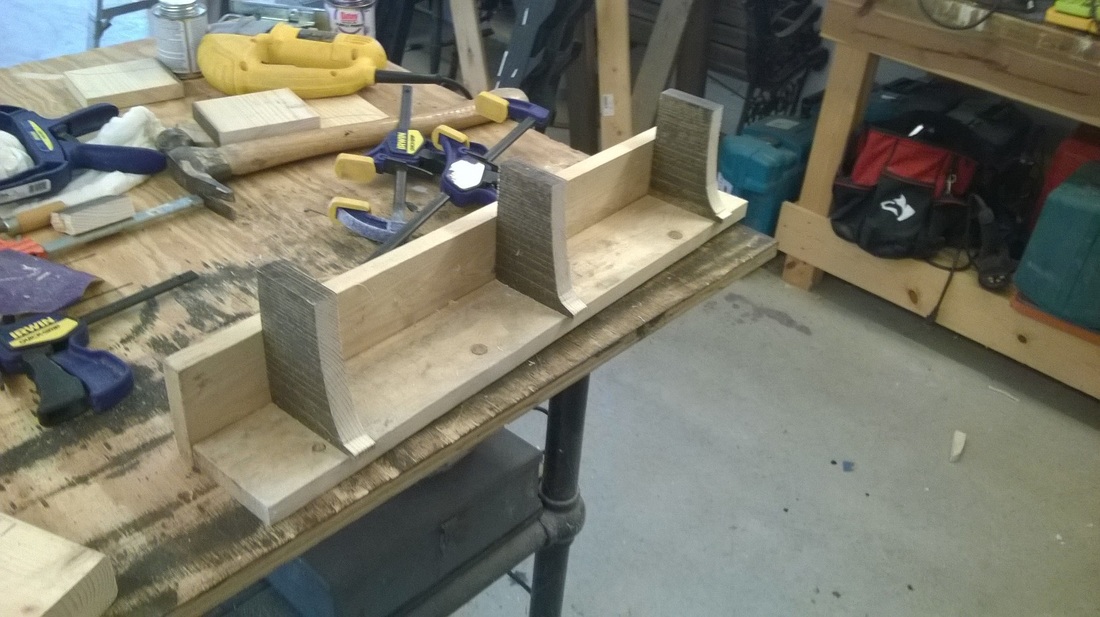
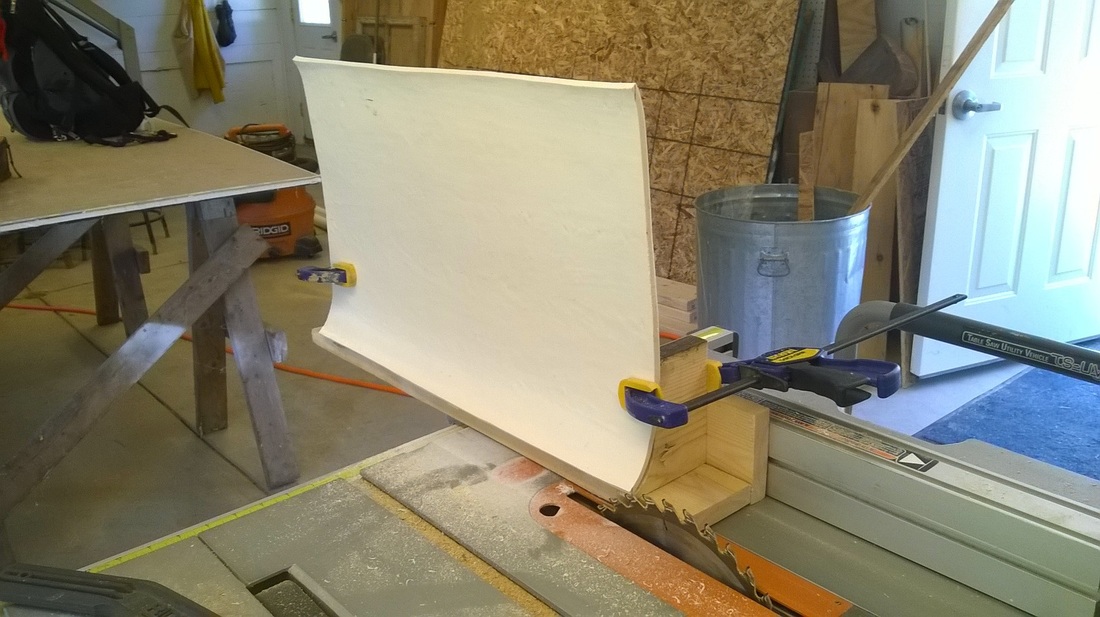
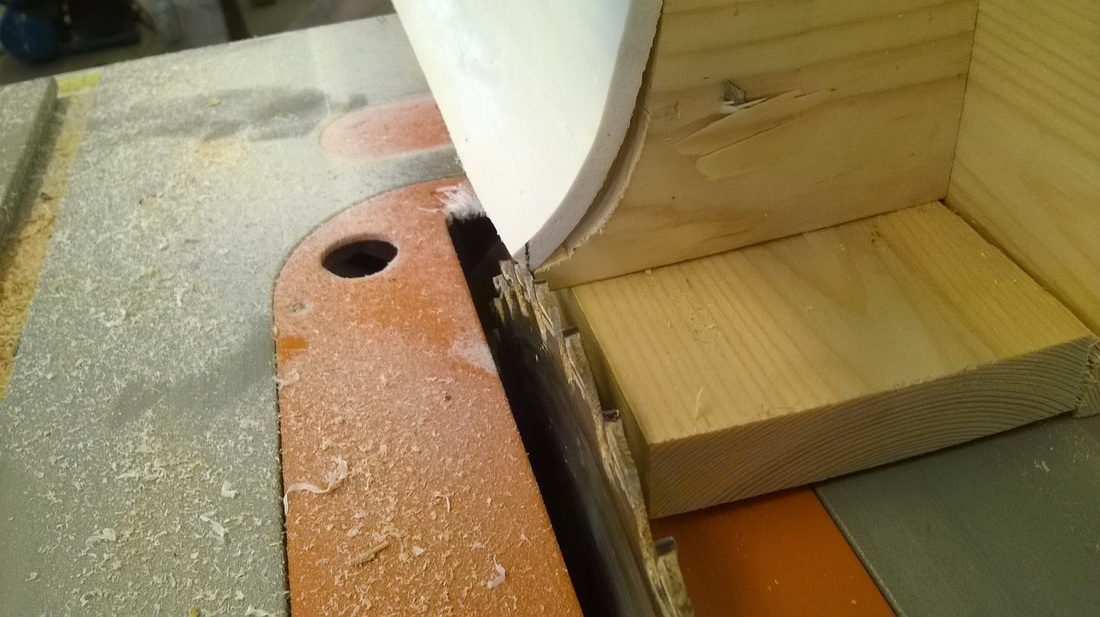
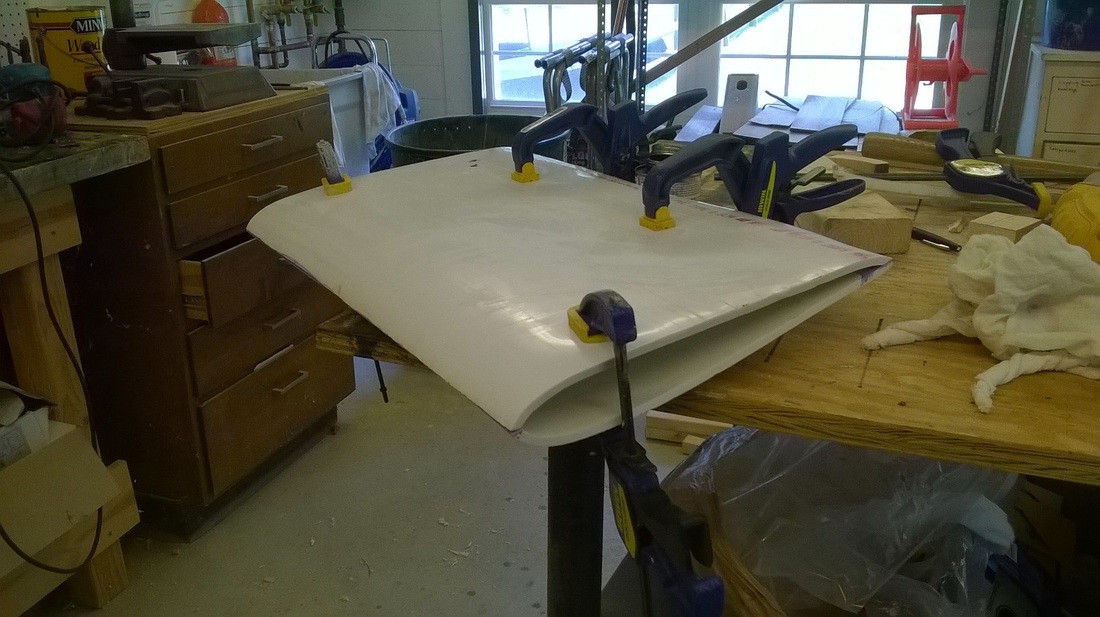
I curse the times when Solidworks makes fabrication of an object seem 10x easier than it actually is! These dang airfoils have been the bane of my existence here for the past few days! I spent a little bit of time on Wednesday trying to figure out the best way get the shape I wanted. It was a process, let me tell you! I've used so many tools these past few days trying to get the shape I wanted. Each tool had it's ups and downs, but after about three solid days of playing around, I think I have finally figured out the best way to trim these airfoils down. I've outlined below. First things first, what do I mean by trim down? The total circumference of a 4" PVC pipe is somewhere around 14.5" long. My airfoil needs about 14" of PVC to make a half. Therefore, I need to trim off about 0.5" of material in order to make sure my two halves will fit together. When I molded the PVC, I left just a tad bit on the front, and about a pinky's width worth on the back. However, I can't just casually hack off this amount. In order for the two halves to be mated properly, I need these cuts to be flat, straight cuts. That way, when I join the two halves together, there is a nice flat surface for the PVC glue to stick to on either side of the PVC joint. However, the new shape of the PVC made it very difficult to get such a cut. For one, the new shape was hard to clamp down for any sort of hand guided sawing (like a jig saw or a handheld circular saw). On Wednesday, I spent about two hours trying to set up a jig-like clamping system. I unfortunately didn't take a picture of it. It was definitely a piece of work. To be honest, it worked for it's purpose. I was able to mount a wing securely so that I could slice a straight line with a jig saw... but even then, the cut angle was not ideal. Plus the line... well it seemed straight at the time, but wasn't actually, so that was sad... My next attempt was a bit better. I was taking with Joe on Friday and he suggested a hand help multitool. It was really just a half circular blade that vibrated really really quickly, but it definitely worked. The main downside to it though was that it was hard to get a good view of the cut. I could get the cut angle I wanted, but there was no way to see the blade in reference to the piece, so the height of the cut got really wonky really quickly. I was able to render some of the waviness with a sander, but even then... things started smelling like silly string, and I figured that was a bad sign so I stopped!
|
Kelly HackerWell hi everyone! Welcome to my blog (the first of it's kind for me!) My name is Kelly, and I am a junior mechanical engineering student at Case Western Reserve University. This summer, myself and a collegue will be working to install a new wind turbine system at the Case Farm. Check back often for daily updates on the progress of our project! Ta-ta! CategoriesArchives |


 RSS Feed
